This page provides instructions on two methods to add a Street View Virtual Tour to Facebook:
How to: Add a Google Virtual Tour to Facebook
Method 1 - Share the virtual tour on your Facebook Timeline, or with friends:
Please watch this brief demonstration video and/or refer to supporting instructions written below:
Step 1: Using a PC, Sign-in to Facebook using the account which manages the business page.

Step 2: Navigate to the virtual tour in Google Maps and select the scene you’d like the tour to start from.

Step 3(a): Click on the three dots (settings) next to the business name in the top left hand corner of the tour.
Step 3(b): Select “Share or Embed” Image.

Step 3(c): Select “Share”, tick the box for the “Short URL” and then copy the Short URL.

Step 4(a): Navigate to your business Facebook Timeline, or the Page or Wall you’d like to share the tour on. Paste the Short URL in the status box.
Step 4(b): Change the default name of the post from “Google Maps” to “Your Business Name” or “Virtual Tour”.

Step 5: Add a supporting image before you post to entice viewers to click through to the tour (this is usually a screenshot image from the tour’s starting point).
Finally, click “Publish” to share the post.

15/02/2018 Note: Currently links to tours on posts are not working correctly with the inbuilt browser on some versions of the Facebook Android app.
Method 2 - Display the virtual tour on your Facebook page using the ``Static HTML`` App:
Step 1: Login to Facebook
")
Step 2:
- Search for “Static HTML iframe tabs” in the Facebook Search bar
- Click on the “Apps” tab/filter
- Click “Use Now”on the “Static HTML iframe tabs” application
")
Step 3: Click on the “Add Static HTML to a Page” button
")
Step 4:
- Choose the Facebook Page you want to display the tour on
- Click “Add Page Tab”
")
Step 4: You will be re-directed to the Static HTML edit page. This is where you will add the tour embed code from the Virtual Tour on Google Maps.
")
Step 5: In a separate browser window, go to Google Maps and locate the virtual tour that you want to host. In the virtual tour, navigate to the starting position you would like the tour to have, then Click on the ‘Settings’ icon (the three dots) and select ‘Share or embed image’.
")
Step 6:
- Click the “Embed image” tab to display the embed code
- Copy this embed code (you will paste it within the Static HTML app)
")
Step 7: Paste the embed code into the Static HTML text box (as shown in the photo)
")
Step 8:
- Click the “Actions” tab
- Click “Edit name and image”
")
Step 9:
- The default name for the Static HTML Page tab is ‘Welcome’. You may enter a new name for the tab here (e.g. ‘Virtual Tour’)
- Click “Save Tab Name”
")
Step 10:
- Click the “Save & Publish” button
- Click “View on Facebook” to return to your Facebook Page
")
Step 11:
- Click on “Settings”
- Click on the “Edit Page” tab on the left hand side
- Drag the new “Virtual Tour” tab to adjust the tab order (settings save automatically)
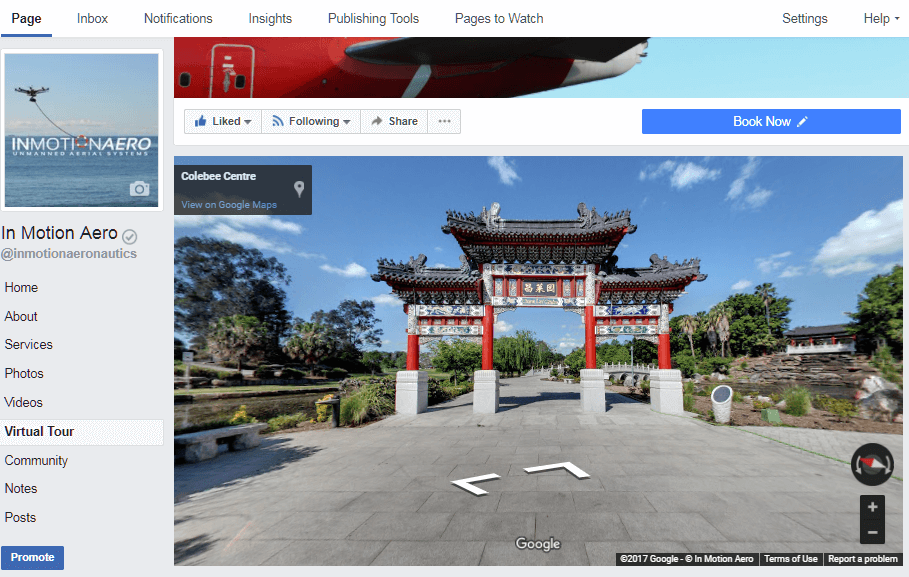
- Complete! The Virtual Tour has been added as a new tab on your Facebook Page.
")